
How to enable dark mode in Microsoft Office on Windows and Mac
- Views: 308
Microsoft Office is one of the most used software in the world. It has a dark mode feature that can be enabled by default. But this feature is not very useful for people who use Microsoft products on a regular basis.
If you suffer from eye strain or tension headaches, you may want to consider enabling dark mode in Microsoft Office. Not only is it easier on the eyes, but it also helps reduce any issues with glare. Not sure how to go about it? Don’t sweat it. We’ve got you covered. Whether you tango with Windows or Mac, we’ll guide you every step of the way.
Also Read – How To Use The New TEXTSPLIT Function In Microsoft Excel
Note: Dark mode is available for Office 365 subscribers and in certain Office 2019 editions.
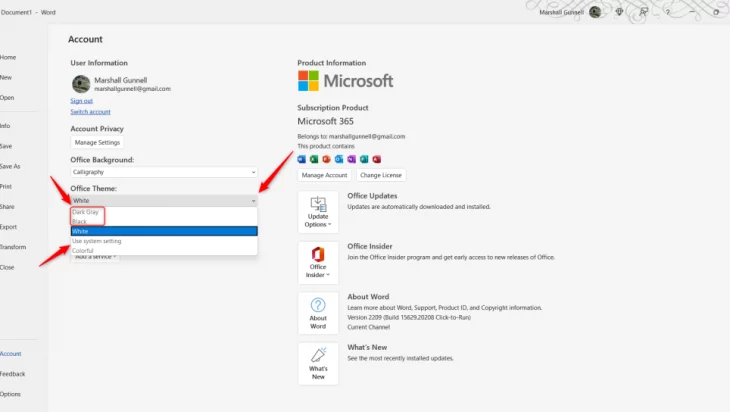
How to enable dark mode in Office for Windows
- Time to complete: 5 minutes
3. Click the box under Office Theme to display a menu with several theme options. Black is the true dark mode. If that’s too dark, though, you can use Dark Gray. Or, if you want to have Office update itself to the current system setting, select Use System Setting.
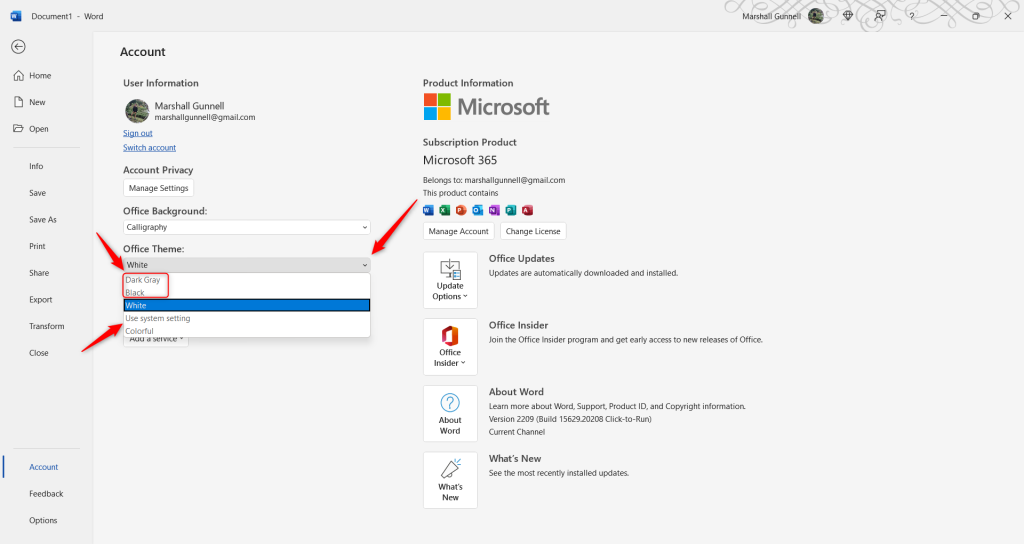
All of your Office apps will now be in dark mode (or the selected theme).
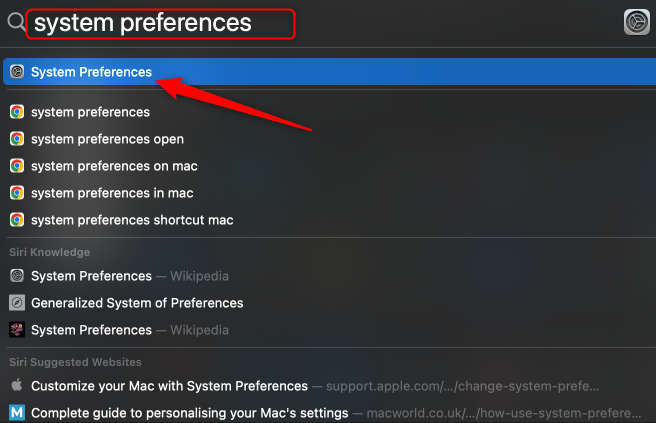
How to enable dark mode in Office for Mac
Office for Mac doesn’t have a built-in theme feature. However, you can still get dark mode in Office by simply switching your system’s theme settings.
First, launch Spotlight Search by pressing Cmd + Space. Type System Preferences into the search box and click the result.
Click General in the top-left corner of the System Preferences window.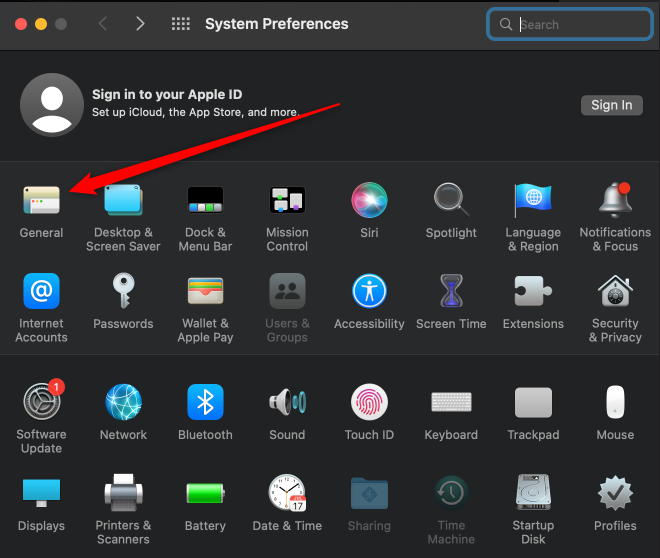
Next, select Dark next to Appearance at the top of the window.

Your system theme is now set to dark mode, so the next time you open an Office application, it will adopt this theme.